
Eco-Chic Styled Shoot
From finding inspiration to executing my vision, in this blog post I break down how this eco-chic styled shoot came to be.

Photo Credit : Angela Fortin Studio
I have always been a creative person, which has come in handy on more than one occasion. For instance, when taking art classes in college and I got a smudge on my project the night before it was due - how would I blend it in purposefully? Or I ran out of the fabric I had planned to make that skirt out of - what would be the best way to make this miscalculation look intentional?
(Have I mentioned before that my background is actually in apparel? It’s amazing how often that experience helps me out as a florist.)
So while an eco-friendly styled floral shoot is a departure from my crazy college art and apparel days, you can imagine how excited my creative-side became by the idea - any flowers, any colors, in any form… talk about creative freedom. Sometimes that amount of creative freedom can become crippling - so where do you go from here?
In order to narrow my focus, step one in creating a vision for my styled shoot was determining a color palette. To be totally honest, you can have the prettiest flowers in the world, but if the colors don’t complement each other, it just doesn’t work. With that in mind, I wanted the color palette to evoke the feeling of transitioning from summer to fall (bonus points if it included my favorite color, mustard yellow), which led to the split complementary color palette below.
What can I say, I’m also a color theory nerd!

With a color palette landed, it was time to start sourcing materials. When sourcing materials I take into consideration a slew of important concepts, such as :
What flowers and greenery are in season?
What materials do well out of water? - OR - What materials don’t need water at all? (hello dried goods!)
What materials give me not only the color variety, but the textural variety I crave as a designer?
How much of each material do I need to execute my vision? (To be totally honest, this is probably the part of the process that takes me the longest)
With the color palette established and all of the above questions taken into consideration, I placed the order for the necessary materials two weeks in advance of the shoot. Now it was time to sit down and wait…
Wait a minute… that’s not right, I still had a ton to do!
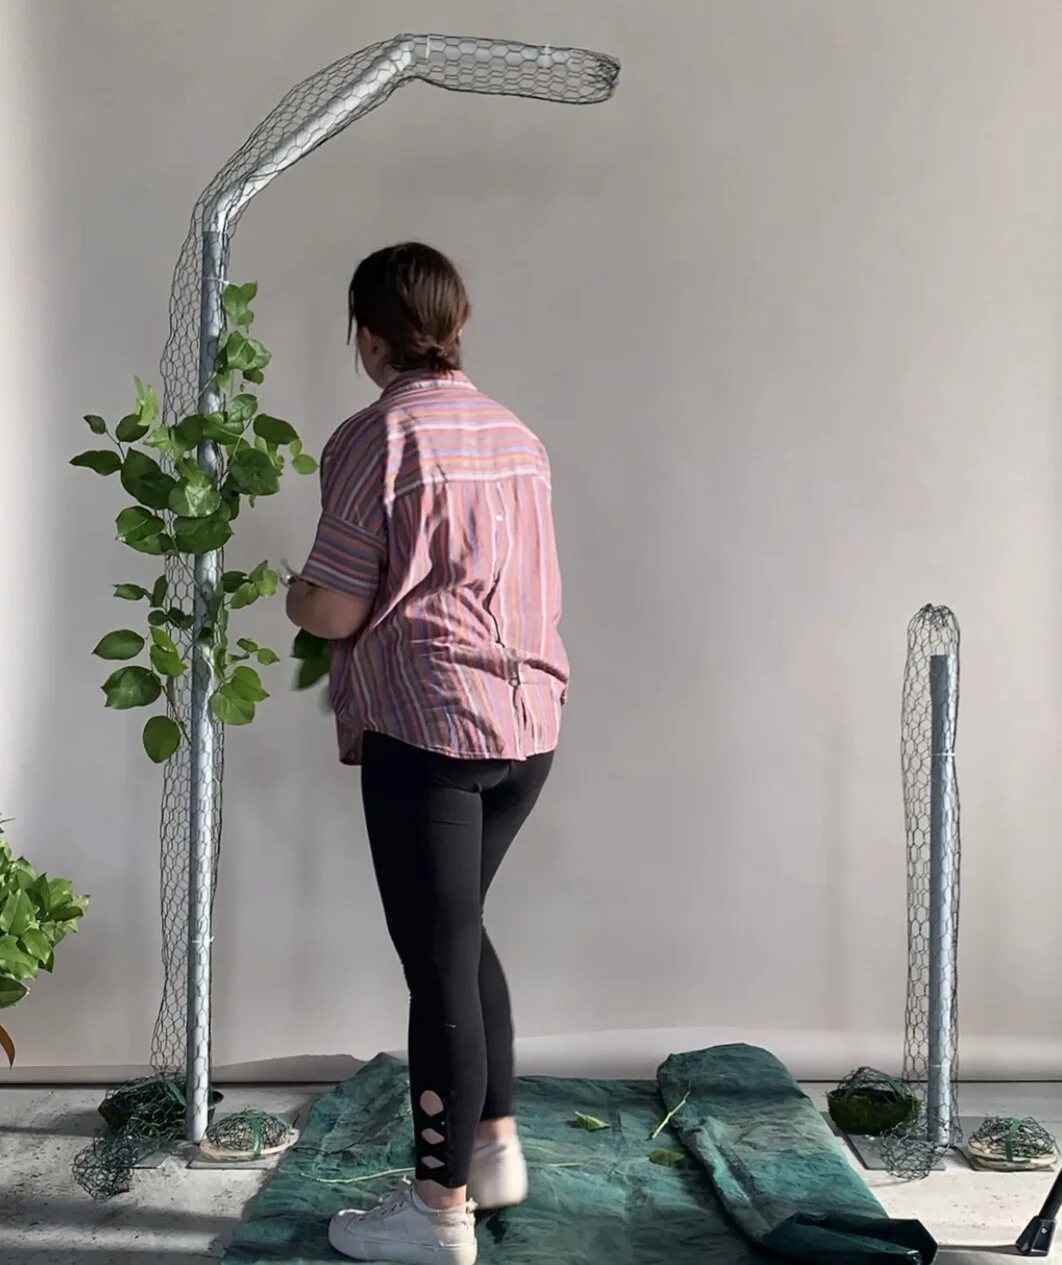
With all of my materials ordered, I started to research the best “foam-free” floral arch techniques, which ultimately drove the final design for my arch mechanism. After much research, I landed on a PVC pipe structure covered with floral chicken wire. All elements of this design are water resistant and won’t rust, so they can be used again and again. With this in mind, I went about sourcing pipe and drape bases (which I scored used, so my wallet was extra happy about that one) and corresponding PVC pipes and fittings. Once everything was assembled in the desired shape, I covered the entire structure with chicken wire - I even left a little bit of chicken wire extending past the bases for a dramatic “garland” effect on the floor.
I’m all about the drama, what can I say?
Before I knew it, the two weeks before the shoot flew by and it was time to pick up and prep all of the materials I had sourced. This is where a lot of the not so glamorous behind-the-scenes work happens. It is so important for the longevity of your cut flowers and greenery that they are properly conditioned and hydrated (or as I like to say, they need a chance to drink). Without this step, the success of a foam free installation is doomed from the start. So two days in advance of the shoot, I processed and conditioned all of my flowers for the eco-chic fun that lie ahead.
Having given my flowers some time to hydrate, the day before the shoot I crafted the bouquet and all-leaf wearable that would be featured elements within the photoshoot. This sort of work is the best kind to do a day or two before the shoot / event, because the bouquet will still have an active water source and the wearable will be getting further “hydrated” in the cooler (that concept is a little bit more complicated and I’ll reserve it for a future blog post, I promise!).


The day of the shoot, it was all excitement and butterflies - I had done the prep work, but now it was time to execute the vision. I woke up bright and early to set out for Angela’s photo studio, with a whole carload in tow (plus some - this was a 2 car trip kind of endeavor). In total it took me a little over 3 hours to assemble the eco-chic floral arch and arrange some flowers in the back of my tricycle (aka the Blümen bike). The actual assembly was a lot of work, but it honestly paled in comparison to the thought and prep work that went into it - in floral design, preparation is key!
After weeks of prep work and hours of installation were complete, the final thing on my list of things-to-do was to style myself and have some fun. I’m not someone who naturally gravitates towards the camera, but it is so incredibly important to me in these strange times we are going through, that you know who I am. Every design, arrangement, or over-the-top idea flows through my mind and out of my hands. I wanted the photoshoot to show this, along with my love of flowers and the joy I feel bringing them to all of you.
As things began to wind down and I started to tear down my eco-friendly floral arch the thought crossed my mind… “This is why I decided to switch career paths at 30 years old, this is what I am meant to be doing.”
Corny? Maybe. The reason I’m a good florist? Definitely.

Photo Credit : Angela Fortin Studio
